
- How to remove background from an image in PowerPoint using the Set Transparent Color tool
- How to remove background from image in PowerPoint: Remove Background tool
- Instances where Background Removal Fail in PowerPoint
- How to Undo Background Removal in PowerPoint with the Set Transparent Color tool?
- How to undo background removal in PowerPoint with the Remove Background tool?
- PowerPoint presentation hacks – Consider these Ideas after Picture Background Removal in Microsoft PowerPoint
- Conclusion
How to Remove Background from a Picture in PowerPoint?

While working on your PowerPoint presentation, you will find better ways to optimize the space on each slide. One best way to do it is to remove the background from pictures in PowerPoint. It also means removing distracting elements from the slide and making it look cleaner. Besides having more space for text, it gives your PowerPoint presentations a creative touch. Because of that, it’s always good to know how to remove background from a picture in PowerPoint.
So, how do you remove the background from a picture in PowerPoint? There are broadly two routes to do it within PowerPoint. One is by using the Remove Background tool and the other is by using the Set Transparent Color tool. In this article, we will guide you through both the methods, differentiate the instances where these methods would be useful, how to undo these actions, instances where background removal would fail, and certain PowerPoint presentation hacks after the backgrounds are removed.
Read to find them out!
Table of contents
- How to remove background from an image in PowerPoint using the Set Transparent Color tool
- When should you use the Set Transparent Color tool?
- The Process
- Facts to note while using the Set Transparent Color tool
- How to remove background from image in PowerPoint: Remove background tool
- When should you use the Remove Background tool?
- The Process
- Instances where Background Removal Fail on PowerPoint
- How to undo background removal in PowerPoint with the Set Transparent Color tool
- How to undo background removal in PowerPoint with the Remove Background tool
- PowerPoint presentation hacks – Consider these Ideas after Picture Background Removal in Microsoft PowerPoint
- Conclusion
How to remove background from an image in PowerPoint using the Set Transparent Color tool
When should you use the Set Transparent Color tool?
The Set Transparent Color tool can be used in PowerPoint presentations to remove picture backgrounds in cases where the image have solid backgrounds. If the picture you wish to remove background has elements like shadows, trees, or any complex objects, skip this method and read the next method explained below.
The Process:
1. On the PowerPoint slide, select the picture from which the background needs to be removed.
2. Click on the Picture Format tab in the PowerPoint ribbon.
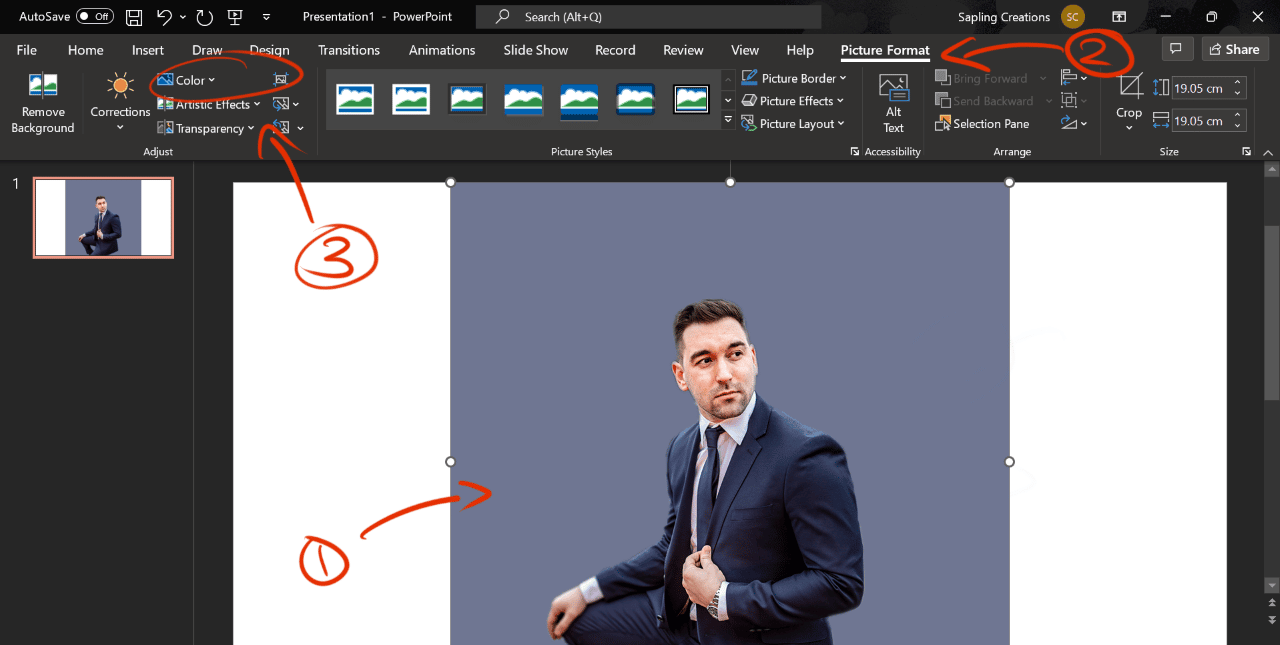
3. Toward the left-hand side, you will find the Colour dropdown. Click on it to find an option called Set Transparent Color at the bottom of the dropdown.

4. Finally, click on the background area that needs to be removed from the picture. This action removes the background.
Facts to note while using the Set Transparent Color tool:
The Set Transparent Color tool feature works only on solid backgrounds shot at a studio without any shadows. Anything that even looks like a solid background to the naked eye might not give the best result with this tool. This is because certain pictures that have solid backgrounds could have texture differences. You most probably would end up having a background that’s partially removed from different areas.
So, it is in cases like these you would require the following method. Read on how to remove background from an image in PowerPoint using the Remove Background tool.
How to remove background from image in PowerPoint: Remove Background tool
When should you use the Remove Background tool?
Not all the pictures you gather to use on your PowerPoint presentation will have a solid background. You can use the Remove Background tool to remove the background of a picture with complex backgrounds. It can be textures, elements like beaches, trees, or any vaguely defined objects in the background.
The Process:
1. Start with the usual – click on the image to perform any changes to it on PowerPoint presentation.
2. Head over to the Picture Format tab on the toolbar. If you are unable to find this tab, it means the image hasn’t been selected yet. So, double-click on the image in such cases.
3. Click on the Remove Background, or the Format > Remove Background option placed on the left-hand side.
4. This action will result in PowerPoint marking the background of the image with a magenta color. The areas of the image where the natural color is still intact will stand out with the default magenta-colored background demarcation.
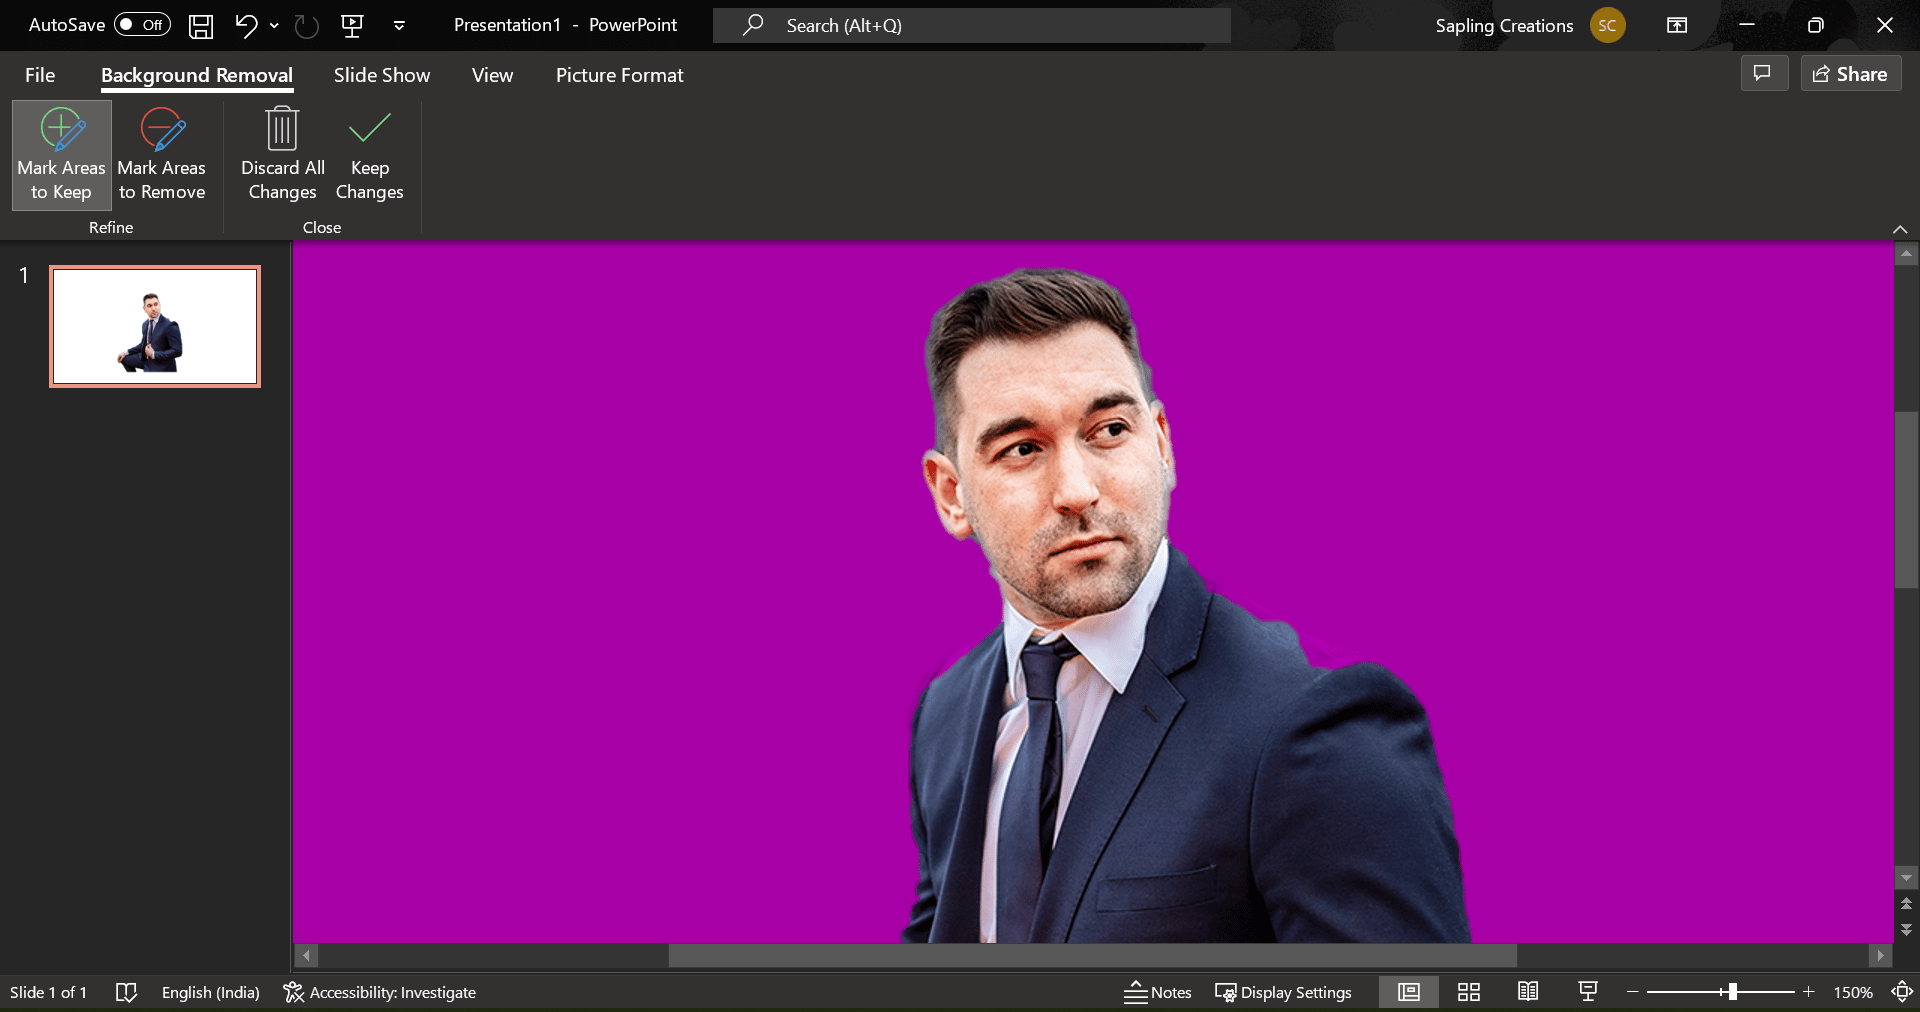
5. While the colored marking is only based on PowerPoint’s intelligence, you can tweak it if the area marked isn’t right. For this, click on Remove Background, where you will see the picture tools: Mark Areas to Keep and Mark Areas to Remove.
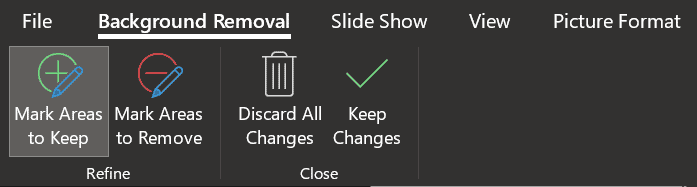
You can select Mark Areas to Keep option (located on the left-hand corner of the tools) and use the drawing pencil (your cursor will turn into a free-form drawing pencil) to mark the areas you wish to keep by removing the magenta color from it. To select a wider area, you can click and drag. Or, simply click or draw a line on the picture to make PowerPoint highlight areas that need to be kept based on its intelligence. This feature will help you include tiny elements that would have gotten removed initially.
Otherwise, if you want to remove more parts from the default marking, click on the Mark Areas to Remove option and use the drawing pencil to mark the areas you wish to remove.
6. The changes made in the previous can be finally applied by selecting the Keep Changes option on the toolbar.
Instances where Background Removal Fail in PowerPoint
While we explained the two ways to remove backgrounds, you still could encounter trouble while trying to remove backgrounds from certain images. For instance, suppose you are trying to remove background from an image where the color of the background and the color of the main element is the same or similar. You will never be able to precisely remove backgrounds in such cases. Likewise, tiny details such as gradients, hairs, or feathers will also get removed irregularly, hindering good outputs.
So, if you encounter such cases, we suggest you skip that image and replace it with a better one – one that can be worked with while removing backgrounds.
How to Undo Background Removal in PowerPoint with the Set Transparent Color tool?
You don’t always have to be happy with the output after background removal. The result can be way different from what you expect it to be. The background removed using the Set Transparent Color tool can be undone by going to Edit > Undo Set Transparent Color. Otherwise, simply use the keyboard shortcut CTRL + Z for Windows or cmd + Z for Mac.
How to undo background removal in PowerPoint with the Remove Background tool?
You can undo the changes that happened to a picture after using the Remove Background tool by selecting Picture Format > Remove Background and clicking the Discard all changes option. This will undo all the background removal edits done by you on the picture.
PowerPoint presentation hacks – Consider these Ideas after Picture Background Removal in Microsoft PowerPoint
You can definitely make your presentation look creative by removing unnecessary picture backgrounds. But, that isn’t it. There are more hacks that you can implement to make your slides look better just with the help of background removal tools. Read each of them and try implementing them step-by-step:
- You can remove the backgrounds from different images with objects placed on a background. Now, use the separated objects from them, and put them together to combine & create an entirely new image. This resulting image is a combination of the objects from the rest of the images which are later put together into a single one.
- To make this combination of different image elements look good, you can add appropriate backgrounds to it separately after this step. To add such backgrounds, right-click on the slide from the slide list on the left-hand side, click Format Backgrounds, select Picture or texture fill, and click on Insert under Picture Source to browse and confirm a background of your choice. You can also adjust the Contrast and Temperature of this image for your liking. Check out this article to learn about creating awesome backgrounds for your PowerPoint slides.
- If you wish to have a graphic background, select Solid fill under Format Backgrounds, and click on Color to choose any color of your choice as the background.
- Additionally, after playing with a combination of images and backgrounds, you can reposition images on your slide to be in the background, foreground, or in between.
- You can further enhance the image by applying an artistic effect or adding picture effects.
- You can even save the image you created after performing all these actions for later use by right-clicking on it and clicking Save as Picture.
Conclusion
We hope you got the answer to the question – of how to remove a picture background in PowerPoint. While we have two methods to remove picture backgrounds, you can go for free online background removal tools as well. But, that requires you to use something that’s not within the PowerPoint ecosystem.
Remember, not all backgrounds can be removed precisely. So, it is important to understand where the background removal tools fail. Do not stop with just plain background removals, use the feature along with other PowerPoint features to get a unique output.
Removing backgrounds, and using various PowerPoint features on your presentations makes it impressive in front of the people you present them to. Optimize the area on your slides, make it creative, use your own images rather than stock images, and make your PowerPoint presentation memorable.
Related Articles
-
 November 1st, 2022
How to Change the Color of Bullet Points in PowerPoint
PowerPoint How To -
 September 5th, 2022
How to Convert PowerPoint to a Word Document?
PowerPoint How To -
 May 21st, 2024
How to Use PowerPoint on an Android Smartphone – Basic Overview
Blog Post