
How to Add 3D Models in PowerPoint: A Beginner’s Guide

PowerPoint presentations have evolved significantly over the years, offering features that make slides more engaging and interactive. One of the most exciting enhancements is the ability to insert 3D models directly into your slides, transforming static content into dynamic visuals. If you want to make your presentation stand out, integrating 3D elements can give your audience a better grasp of your ideas. This guide will walk you through the steps to seamlessly insert and customize 3D models in PowerPoint.
What Are 3D Models in PowerPoint?
A 3D model is a digital representation of an object that allows you to view and manipulate it from multiple angles. Unlike traditional images or 2D graphics, a 3D model provides depth, movement, and enhanced interactivity, making your presentations more visually appealing. Whether you are presenting a product prototype, an architectural design, or an educational concept, using 3D models helps you create a more immersive experience.
Step-by-Step Guide to Inserting 3D Models in PowerPoint
1. Open PowerPoint and Create Your Slide
Launch PowerPoint and either create a new presentation or open an existing one. Navigate to the slide where you want to insert a 3D model.
2. Go to the ‘Insert’ Tab
Click on the ‘Insert’ tab in the top menu. This is where you’ll find all the tools to enhance your slides, including images, shapes, and 3D models.
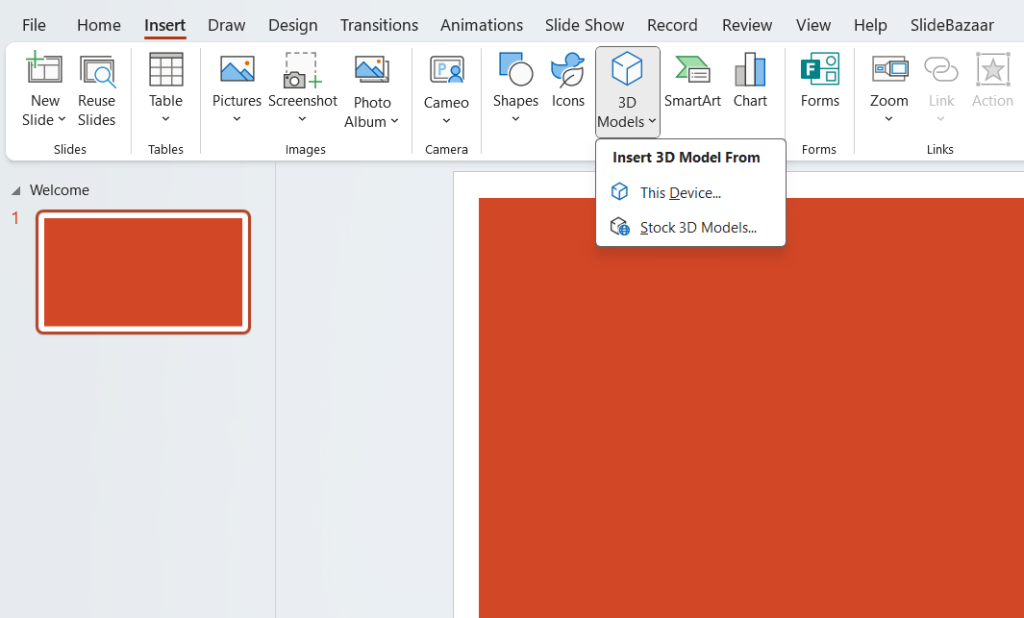
3. Select ‘3D Models’
Under the ‘Insert’ tab, locate the ‘3D Models’ option. Clicking this will give you two choices:
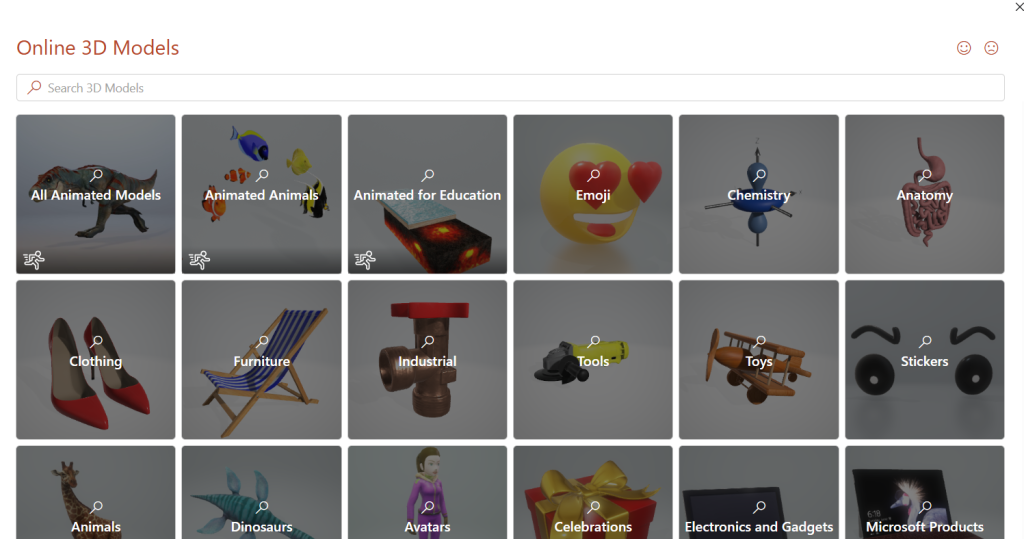
Online Sources – Browse Microsoft’s online library of 3D models, categorized by themes and subjects.
This Device – If you have a 3D model file (.glb, .fbx, .obj, etc.) saved on your computer, select this option to upload it.
4. Choose and Insert Your 3D Model
Once you find the perfect 3D model, click ‘Insert’ to add it to your slide. It will appear as an interactive object that you can rotate and resize as needed.
5. Adjust the Position and Size
After inserting the 3D model, you can reposition and resize it by clicking and dragging its edges. You can also use the rotation handle to change its orientation, ensuring it fits well within your slide’s layout.
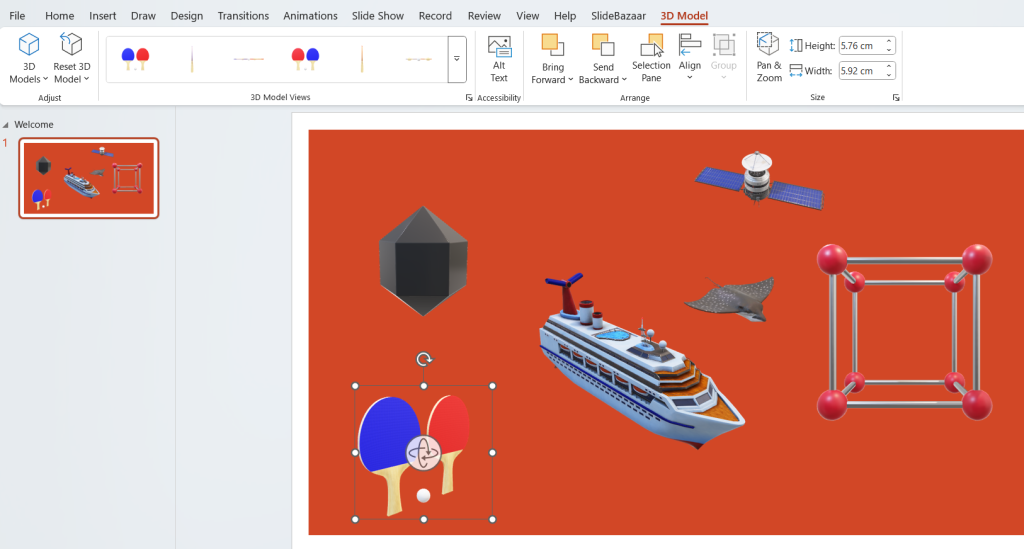
6. Customize Using ‘3D Model Tools’
When a 3D model is selected, a new tab called ‘3D Model Tools’ will appear in the toolbar. This allows you to:
Change viewing angles using preset 3D views.
Resize the model without distorting proportions.
Apply effects such as shadows and reflections to enhance its appearance.
Bonus Tip: Animating Your 3D Models
Want to add motion to your 3D model? PowerPoint allows you to animate 3D objects to make them even more dynamic. Here’s how:
Click on your 3D model.
Go to the ‘Animations’ tab in the toolbar.
Select from animation effects like ‘Turntable,’ ‘Swing,’ or ‘Jump & Turn.’
Customize the animation duration and direction to fit your needs.
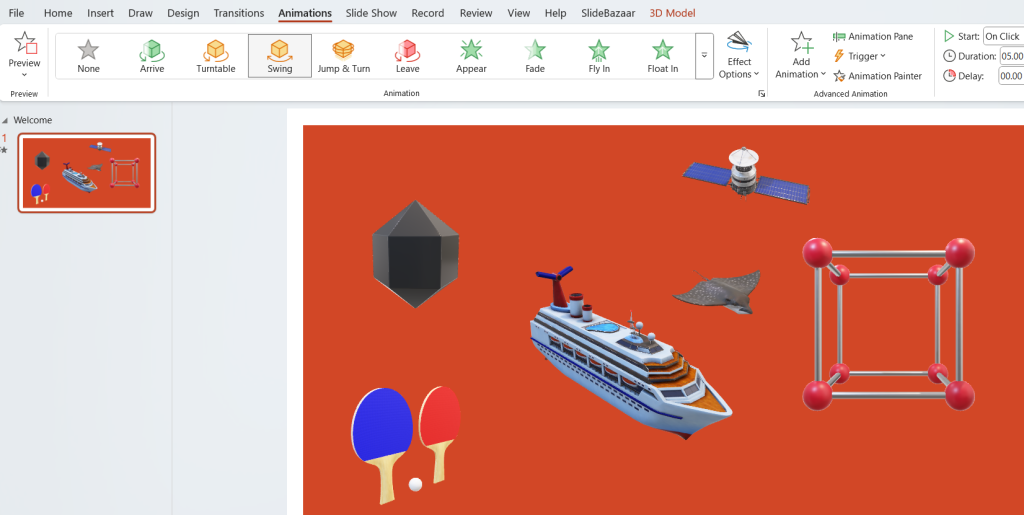
Animating 3D models is particularly useful for product demos, medical illustrations, and technical walkthroughs, adding a professional touch to your presentation.
Why Use 3D Models in PowerPoint?
Enhances Visual Appeal – 3D elements make presentations more engaging and interactive.
Improves Understanding – Viewers can examine objects from different angles for better comprehension.
Professional Edge – Using 3D models adds a modern and polished look to your slides.
Final Thoughts
Adding 3D models in PowerPoint is a game-changer for anyone looking to elevate their presentations. Whether you are an educator, business professional, or designer, leveraging this feature can make complex concepts easier to understand and more visually impactful. Next time you create a presentation, try incorporating 3D models and watch your audience’s engagement soar!
Looking for pre-made 3D shapes to save time? Explore our 3D Shapes PowerPoint Templates for a variety of ready-to-use designs!
Related Articles
-
 September 29th, 2022
The Best Roadmap Tool for Every Type of Roadmap
Blog Post -
 October 16th, 2025
Quarterly Tool Reviews: Stay Ahead of New Presentation Software That Could Help Your Team
Blog Post -
 November 4th, 2025
Top Free Resources Online That Will Help Upskill Your Presentation Team
Blog Post