How to Use Cameo in PowerPoint: Guide + Tips

In this article, we’ll explore how you can use Cameo in PowerPoint.
Cameo is a feature in PowerPoint that allows you to integrate live camera feeds directly into your slides, to make your presentation more engaging and interactive.
Here’s what that looks like:

You can use this feature when you’re presenting to include a camera feed into your slide. Your audience will be able to see and hear you speak while you present your slide show. It’s a game changer when you use it right.
Let’s now take a look at how you can use Cameo in PowerPoint, along with some tips on using it better.

Getting Started with Cameo in PowerPoint
To insert a Cameo into your PowerPoint presentation:
Open your PowerPoint presentation.
Go to the Insert tab on the PowerPoint ribbon.
Click on Cameo

You have the option to add Cameo to a particular slide, or to your entire presentation:

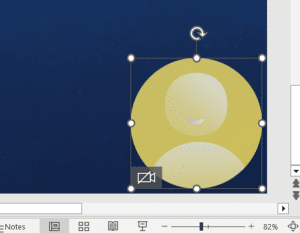
Choose what you want and a placeholder will appear on your slide that looks like this:

Click on the camera button on the bottom left corner to switch on your camera.
Selecting the Camera:
If you have multiple cameras connected to your device, you can choose which camera should be used. To do this, click on the placeholder, and a new tab will appear in the ribbon, named Camera Format.
Under Camera Format, find and click on the arrow below Preview to select the camera you want. In the following screenshot, you can see that I’ve only got 1 camera.

You can also use the Camera Format tab to adjust how your camera feed looks like on the slide.

Change the border of your cameo, shape, and apply it to all slides with just a click of a button.
You can also fine-tune how the cameo appears by cropping and arranging it, using the features available in the Camera Format tab.
I would suggest that you also add an animation to the cameo. Click on the cameo placeholder, and go to the Animations tab and select an animation that works.
Presenting with Cameo
To present with Cameo, start your slide show as you would normally. Select Slide Show from the ribbon and click From Beginning.
When the slide with the cameo appears, you will be able to see your camera feed in the slide.
If you’re presenting during a Tams meeting, using PowerPoint Live, Teams can automatically detect the Cameo, and switch to Cameo mode, inheriting Teams’ camera settings. But this only works if your presentation already has a Cameo in it. So be sure to do that first, before you start presenting.
Recording with Cameo
Mac users can record their camera feeds with Cameo. To do this got to the Recording tab, and click on Cameo.
After setting up your Cameo, go to Record again, and select Record Slide Show. You can then record the slide show, and what you record in the camera feed will be saved as a recording. It’s as simple as that.
Note:
If you’re a Mac user, and are struggling to make Cameo work, try granting permission to PowerPoint in your computer’s privacy settings.
Some Tips for Using Cameo
Ensure your camera is properly set up and the lighting is adequate for the best video quality. Most laptops have poor video quality, and these cameras need a lot of light to look good. So place yourself near a light source, or sit next to a window.
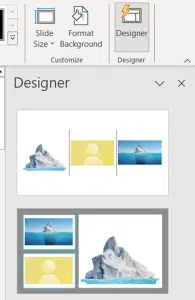
If you’re unsure about where to place your Cameo placeholder, you can use Designer. Go to the Design tab, and click on Designer and PowerPoint will suggest some layout options for your slide.

Cameo in PowerPoint is a powerful tool that can make your presentations much more engaging, if used right. By following these steps, you can create a more personalized and impactful presentation that stands out. Remember to test your setup and practice well before the actual presentation to ensure everything runs smoothly. Happy presenting!


