How to Create an Interactive Quiz in PowerPoint

You know by now that PowerPoint isn’t just for creating presentations. It’s also a great tool for designing interactive quizzes. Whether you’re a teacher, trainer, or simply looking to add some fun to your slides, this guide will walk you through the steps to create an engaging quiz using PowerPoint. It’s super easy to do, all you need are some question slides, and some feedback slides, and you only need to link them all together.
If you’d like to watch a video on this, here’s one from our YouTube channel:
If you’d rather read an article instead, keep reading. Let’s dive into creating a quiz in PowerPoint.
Step 1: Prepare Your Quiz Slides
To start, you’ll need three types of slides:
- Question Slide
- Correct Answer Slide
- Wrong Answer Slide
And here are some tips on creating them.
Creating the Question Slide
Right-click on a blank slide and select Format Background to change the background color for a visually appealing layout.
Then, add your question text at the top. Choose an appropriate font, and make sure it is larger than your answer choices.

Use separate text boxes for each multiple-choice answer option.
Include graphical elements or icons to make the slide more engaging.
For reference, here’s what a question slide will look like:

Creating Feedback Slides
Now let’s create 2 more simple slides, that will appear whenever someone clicks on a wrong or correct answer.
Correct Answer Slide: Use a green background to indicate a correct answer. Make sure you add a text box in one corner of the slide that people can click to progress to the next question. Here’s what that looks like:

Wrong Answer Slide: Use a red background for incorrect answers. Add a text box to take users back to the original question slide. Here’s what that looks like:

Once you’ve created these slides, duplicate them to match the number of questions in your quiz.
Your slides should be in this order:
- Slide 1: Question 1
- Slide 2: Wrong Slide 1
- Slide 3: Correct Slide 1
- Slide 4: Question 2
- Slide 5: Wrong Slide 2
- Slide 6: Correct Slide 2

And so on… Now let’s move to the next step.
Step 2: Make It Interactive
Here’s where the magic happens—making your quiz interactive with hyperlinks.
Set Up Hyperlinks
Go to the first question slide.
Right-click on each answer option and select Hyperlink. In some versions of PowerPoint, it will be “Link“.

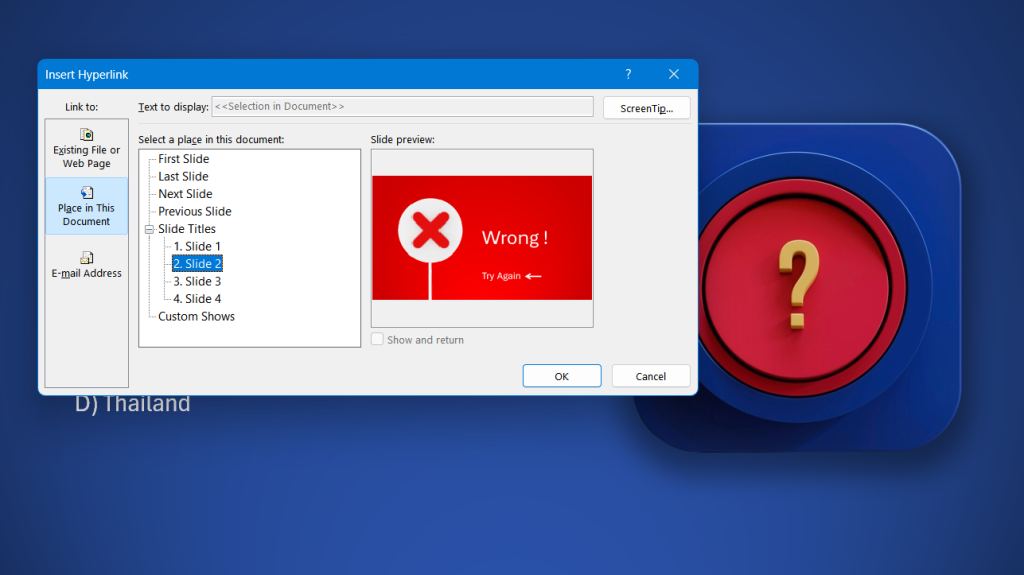
In the “Insert Hyperlink” window, choose Place in This Document and link the option to either the “Correct Answer” slide or the “Wrong Answer” slide, depending on the correctness of the choice:
Repeat for All Slides
Apply the same process to every question slide, ensuring all answer options are hyperlinked correctly.
Important note: Make sure you add hyperlinks to the response slides as well. Link the “Try Again” text in the Wrong slide to the current question, and the “Continue the quiz” text in the Correct slide to the next question.
Hide Feedback Slides
Now when you browse through the questions, you don’t want the feedback slides to appear between every question. To do this, you need to hide the feedback slides. To do this, right-click on the “Correct Answer” and “Wrong Answer” slides and select Hide Slide.

Step 3: Test Your Quiz
Run your slideshow and click through the questions to verify that all hyperlinks work as intended. Your interactive quiz is now ready to impress your audience!
Final Touch
Congratulations! You’ve created a dynamic quiz in PowerPoint. This method is simple, effective, and requires no additional tools. If you found this tutorial helpful check out our YouTube channel as well.
