How to Use Translate Feature in PowerPoint

In today’s interconnected world, the ability to communicate effectively across languages is more important than ever. Whether you’re presenting at an international conference, collaborating with global teams, or creating multilingual content for your audience, PowerPoint’s translation feature is a powerful tool that can bridge language gaps effortlessly.
Imagine you’re presenting a groundbreaking idea to a large audience and want to ensure everyone understands your message without language barriers. Or maybe you’re preparing a presentation to share with partners worldwide. In both cases, translating your slides can make your content more accessible.
This article will walk you through the step-by-step process of applying the translation feature in PowerPoint, helping you to break down language barriers and enhance the impact of your presentations. Let’s see how to use this secret feature.
Step 1: Open Your Slide
Start by opening the PowerPoint presentation and navigating to the specific slide that contains the text you want to translate. Ensure that the text you wish to translate is visible and selected.
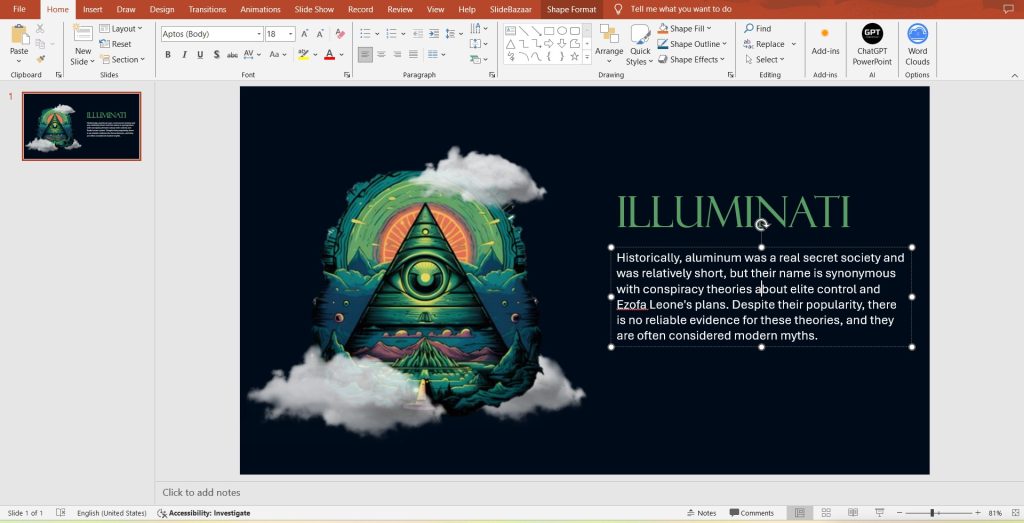
Step 2: Head Over to the Review Tab
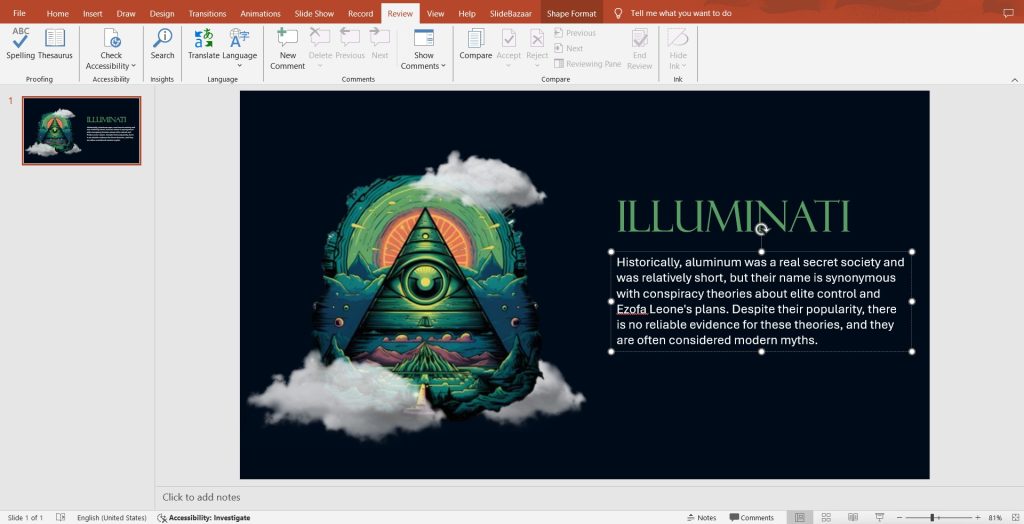
Go to the “Review” tab on the ribbon at the top of your PowerPoint window. This tab contains various tools related to reviewing and editing your presentation.
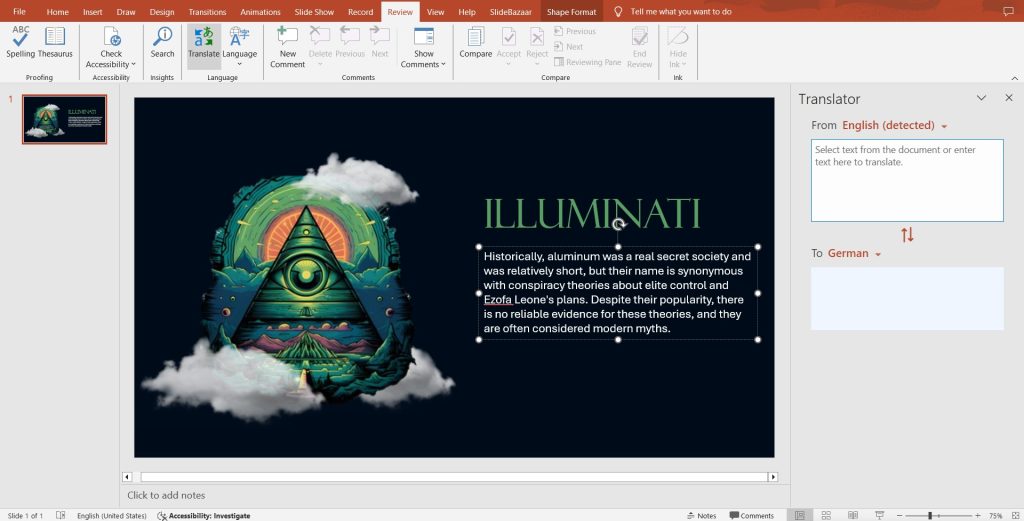
Step 3: Select Translate
In the “Review” tab, find and click on the “Translate” button located in the Language section. This will open the translation options.
Step 4: Click on the Text Box You Want to Translate
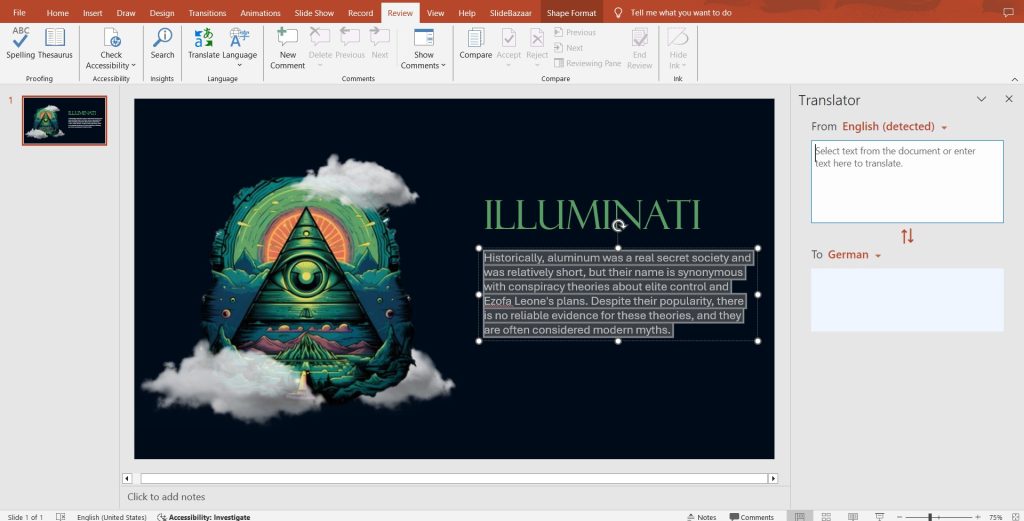
Click on the text box or text area that you wish to translate. This action will highlight the text and make it ready for translation.
Step 5: Look Over to the Right Side of Your Screen
After selecting the text, look to the right side of your screen where the translation pane will appear. This pane will display translation options and a text box for your selected content.
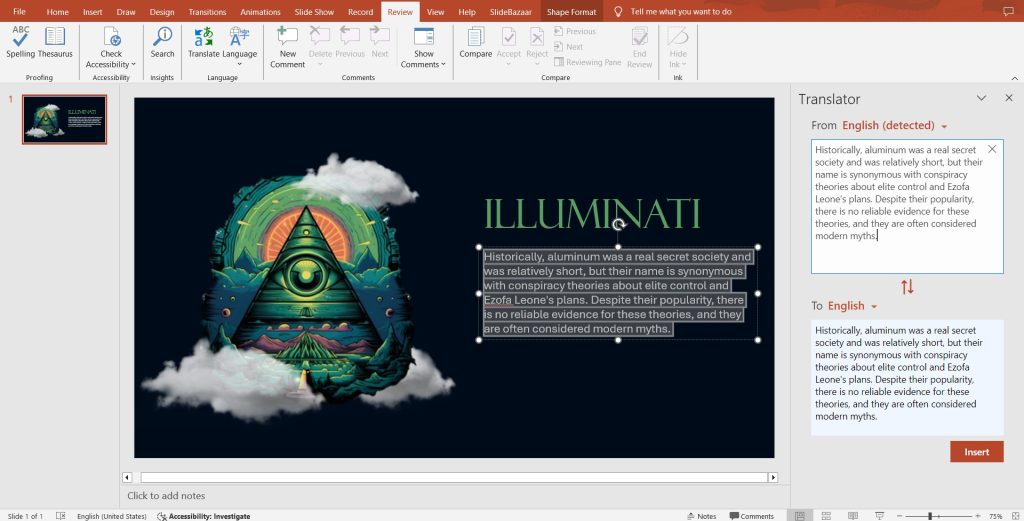
Step 6: The Translator Window Will Appear
In the translation pane, you will see various language options. Choose the language you want to translate your text into by selecting from the dropdown menu.
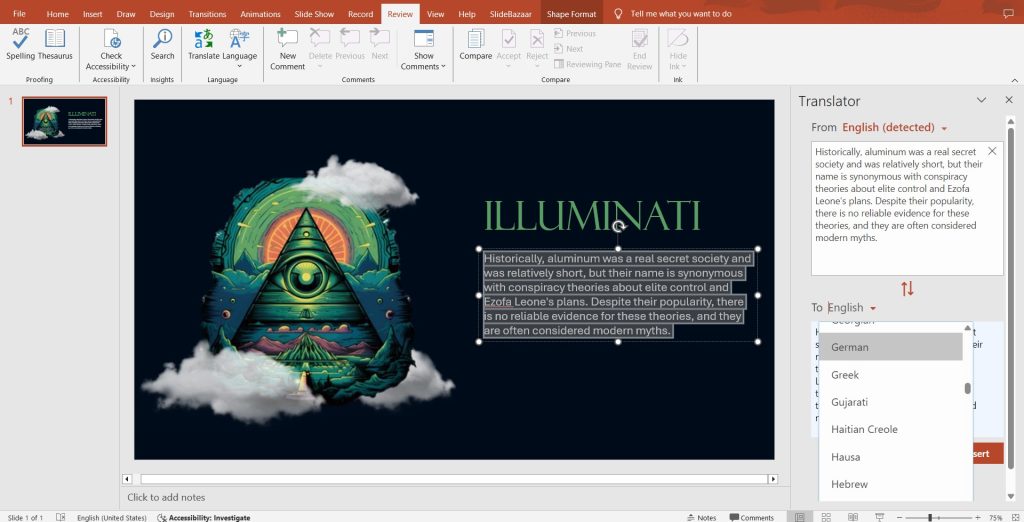
Step 7: Click on Insert to Apply the Translation
After selecting your preferred language, click on “Insert.” This will automatically replace the original text with the translated text in the selected language.
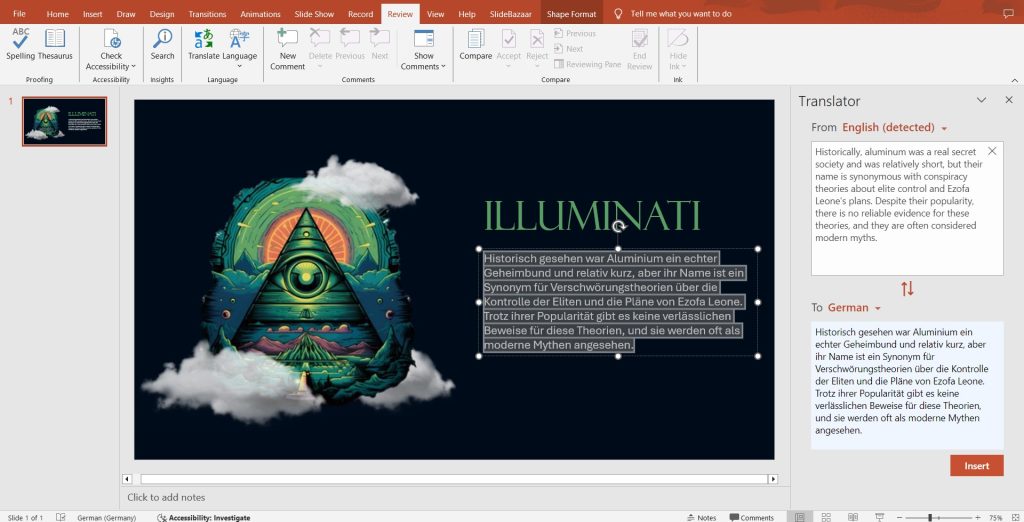
Final Thoughts
PowerPoint’s translation feature is like having a personal translator for your slides. It helps you reach a global audience by turning your text into different languages with just a few clicks. Whether you’re presenting to an international crowd or sharing with friends around the world, this tool makes sure everyone understands your message.
So why not give it a shot? It’s an easy way to make your presentations more inclusive and keep everyone in the loop—no language barriers, no problem!


