
How to Record Your PowerPoint Presentations Like a Pro!


In some cases, while presenting, you’d may want to record your presentation in PowerPoint. If it’s your first time doing this, you may have a ton of questions. In this article, I will try to cover as many doubts as I can. And I will talk about some best practices to keep in mind while trying to record yourself presenting in PowerPoint.
Sometimes, for a presentation, you cannot be there in person to deliver them. Recording yourself along with your slides can be a solution in such cases, allowing you to share your messages effectively, and in some cases, with a wider audience. Here’s a detailed guide on how to record yourself in PowerPoint.
Things to Keep in Mind Before Recording in PowerPoint
Be prepared! Practice as much as you can. Before hitting the record button, rehearse your lines to ensure a smooth and engaging presentation. You can use a timer or a stopwatch to time yourself to ensure that your presentation stays within the desired length.
It is also important to keep your slides visually appealing and concise. Always use clear fonts, avoid having too much text on your slides, and use high-quality visuals to complement your presentation. If you need help with creating visually impressive slides, check out SlideBazaar’s PowerPoint templates.
How to Enable the Recording Feature in PowerPoint
In some cases, you may not be able to see the record feature in the ribbon menu. This is because PowerPoint’s recording feature isn’t always available by default. If this is the case for you, then here’s how you can activate it.
Go to the File tab.
Click on Options.
In the Options dialog box, find and select Customize Ribbon on the left side.
On the right, locate the Main Tabs section and check the box for Recording.
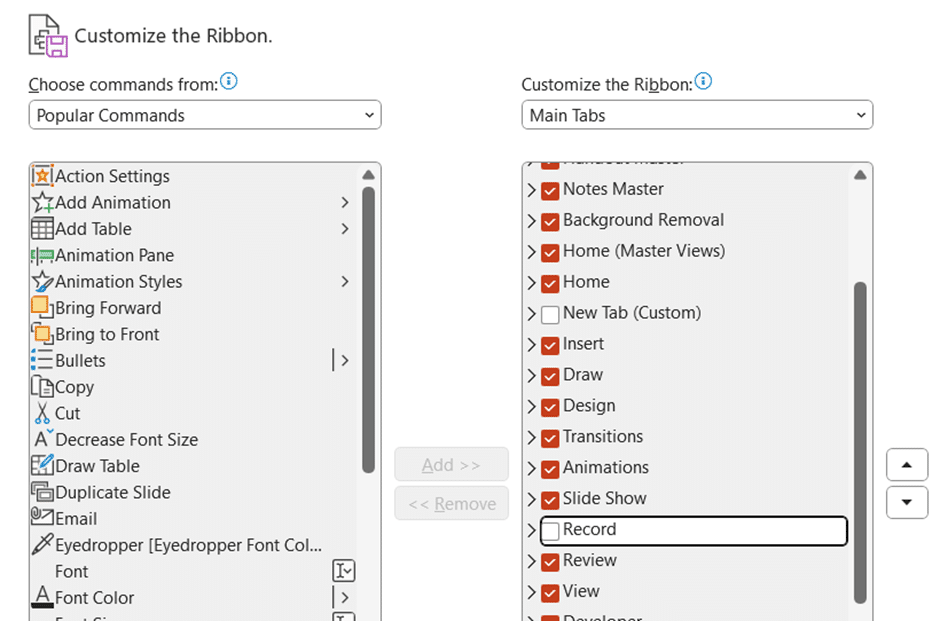
Click OK.
The Record tab should now be visible in the ribbon.
How to Record your Presentation
Now that the recording tab is available in the ribbon, let’s get started with recording yourself in PowerPoint. Navigate to Record in the ribbon.
You can then choose your recording start point as shown here:
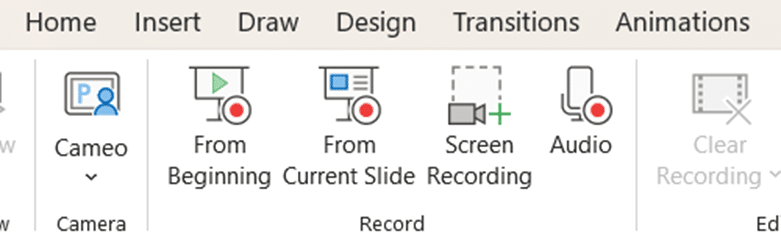
Record from Beginning: Starts recording from the first slide of your presentation.
Record from Current Slide: Starts recording from the slide you’re currently on.
Click on either of the buttons to start recording your presentation. A short countdown will initiate the recording.
You can also use the Screen Recording button to record your screen. Click on it, and PowerPoint will ask you to select the area of the screen you want to record. Once done, the screen recording will appear on your slide.
The Audio button can be used if you just want to record an audio narration for your presentation.
No matter what button you click, and how you choose to record your presentation, speak clearly and confidently as you advance through the slides using the arrow keys or the on-screen controls.
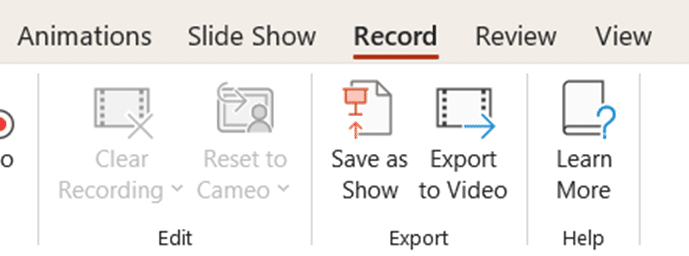
To pause recording, click the Pause button (two vertical lines) on the recording toolbar. Click it again to resume.
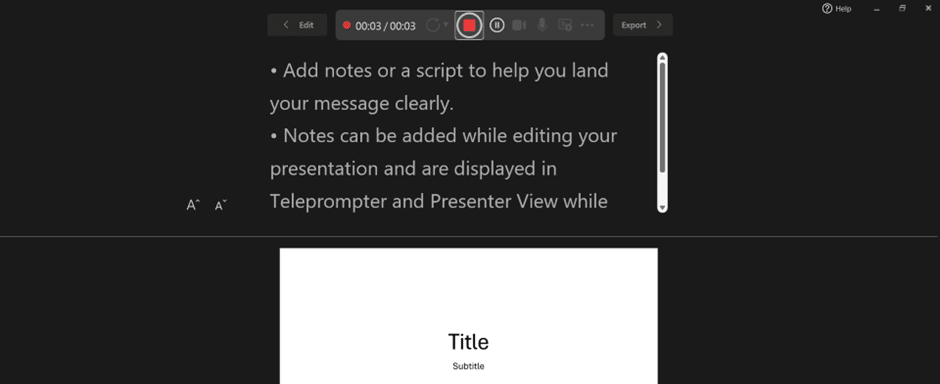
When finished, click the Stop button (square).
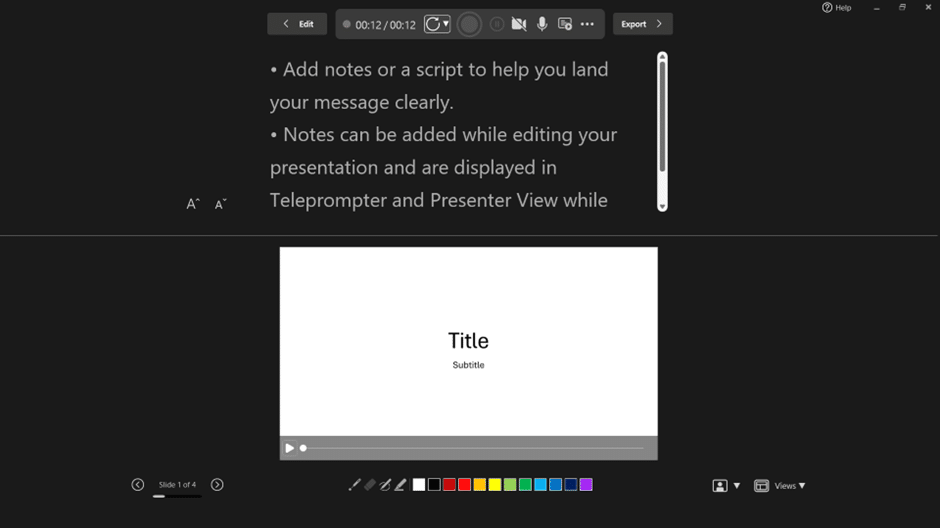
As you can see from the images above, if you add notes to your presentations, they will appear just above your slides. You can use this as a teleprompter to make yourself sound much better.
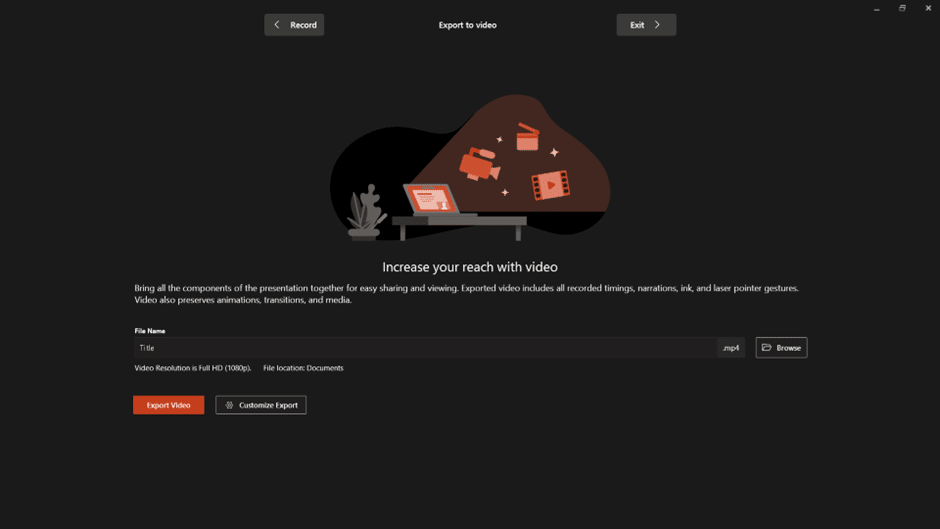
Once you’re done, name the recording and save it.
Recording Tips for PowerPoint
Microphone and Camera Check
Ensure your microphone is selected and properly configured. You can use the 3 dots shown above to set up your microphone and camera.

Always do a test recording to check audio quality first, before actually attempting to record your take.
Lighting and Background
If you’re choosing to record yourself in PowerPoint, choose a well-lit environment with a clean, uncluttered background to maintain a professional look. Also, position your webcam for a good head-and-shoulders view. Look directly at the camera to connect with your audience.
You can also invest in a good external microphone for superior audio quality, especially if recording in a less-than-ideal environment. I would suggest you get a cheap USB microphone, or if you’re looking for something even better, a mic and an audio interface should get the job done.
So there you have it, a quick guide on recording your presentation in PowerPoint. I hope the article was easy to follow, and that you’re able to record your presentations without any problems. In the meantime, if you need help with your presentations, check out SlideBazaar and our presentation templates.
Related Articles
-
 January 16th, 2026
Best Free PowerPoint Templates 2026
Blog Post -
 October 8th, 2025
Rate Any Presentation’s Quality in 5 Minutes With This Simple Scorecard
Blog Post -
 October 20th, 2022
5 Ways to Make a Compelling Presentation Using Document Creation Platforms
Blog Post