
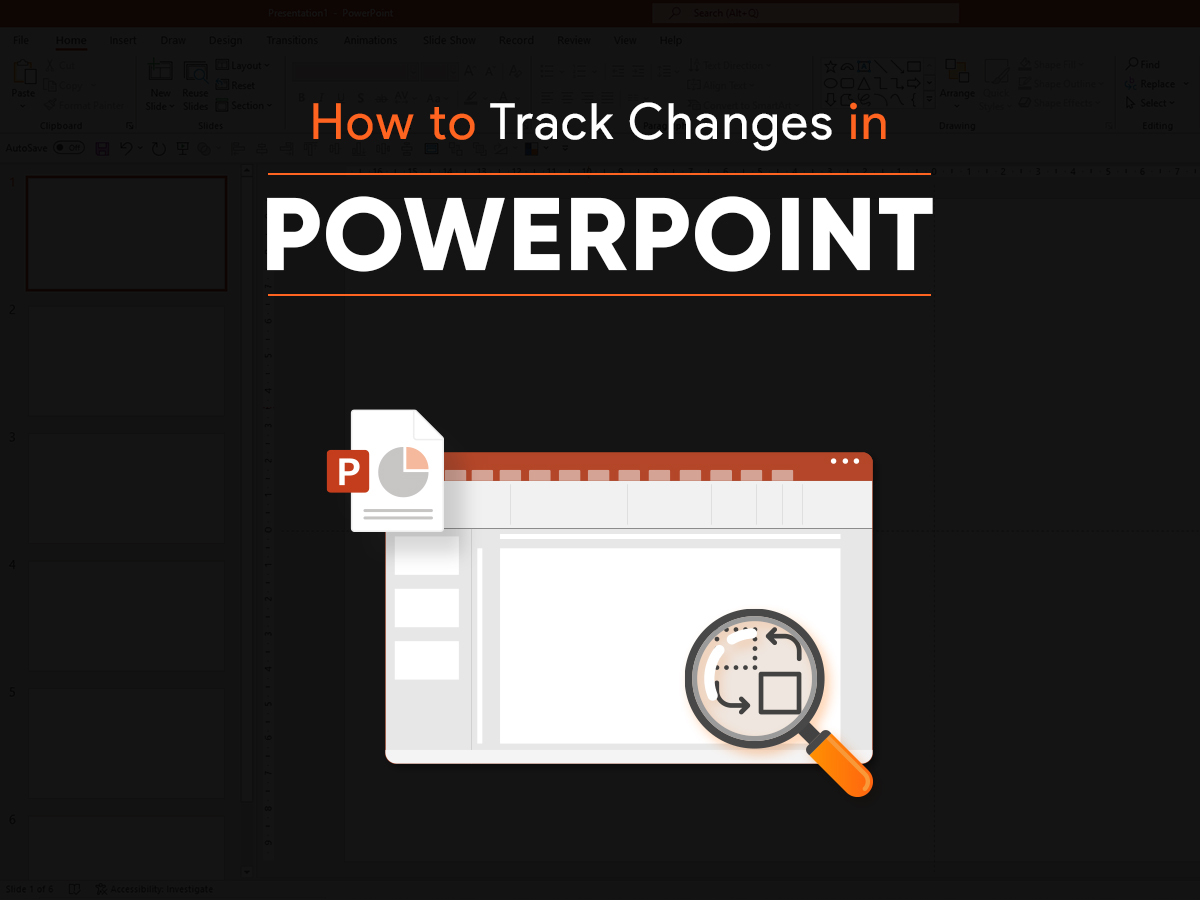
How to Track Changes in PowerPoint

You can track changes in PowerPoint by using PowerPoint’s in-built compare and merge features. To do this, first ensure you have 2 files, one of which is the original. You can then click on Review and Select the modified file. This allows you to check and track all the changes made to the PPT file. You can then approve or reject all changes in a few clicks.
Intro:
People often compare Microsoft Office products like PowerPoint and Word, when it comes to the features these products offer. One such feature is the functionality to track changes. This feature is useful when a group of people are working on the same file. A series of perspectives and ideas can be taken into account if there is a feedback system. But how can we track changes in PowerPoint?
Interestingly, Microsoft PowerPoint doesn’t provide the feature to track changes exactly like the one on Microsoft Word. Instead, it has provisions to accommodate comments and feedback from reviewers. The process starts with saving the PowerPoint file to your computer and sharing another copy for review. After the review, the file is sent back by other team members and it can be compared and merged with the original file on your computer.
Confused? We’ll break down the procedure for you. Read on.
Table of contents
– Save the Original PPT File and Duplicate it
– Send PPT File for Review
– Compare the Files and Merge
– Check Comments and Presentation Changes from the Revisions task pane
– Accept or Reject Changes made by others
– How Should You Use Comments in PowerPoint Review Mode?
– Tips for working in the Comments task pane
– Get better at Reviewing
– Tip for the Reviewers
– Conclusion
Steps to Track Changes in PowerPoint:
Step 1: Save the Original PPT File and Duplicate it
The first step to track changes in PowerPoint is to save the original file in one place and duplicate it. This duplicate copy will be used by others to make their changes and complete their review process.
To save the file, head on to Files, and click Save As after confirming the location and file name. Also, remember to name the original file with easily-identifiable names with a suffix like “ORIGINAL”. This would prevent any sort of confusion in the later stages of the process while you merge the presentations.
It is recommended to save the copy of the presentation (with a different filename) in a shared location like OneDrive or SharePoint so that other team members can access and work on it.
To sum up: Create 2 copies of your PPT file. Add a suffix like “ORIGINAL” to one. The other copy is the one you need to send for review.
Step 2: Send PPT File for Review
Since a PowerPoint presentation is a group effort in most cases, the review process can really polish the final output well. The file simply needs to be shared with the reviewer to suggest or make edits. Out of the many ways to share a file, you are free to choose to send it to the reviewer via email or by using the sharing service.
In OneDrive or SharePoint, simply right-click the file, select Copy Link, and share the link with any one of your team members to review.
The file on the shared location or the file that is shared via email can now be edited by the reviewers. There is no specific procedure that the reviewer needs to follow. Ask them to add comments & their feedback to the presentation and send it back to you.
Step 3: Compare the Files and Merge
Once the review process is completed by your team members, you can work on comparing the two versions of the PowerPoint file. You can easily identify the tweaks and adjustments made by others using the Compare function in PowerPoint.
Before the comparison, ensure that the PowerPoint file with the changes from reviewers is saved in a location that’s easy to find. Once this is done, open your original PowerPoint file, head over to the Review tab toward the right-hand side of the PowerPoint ribbon, and click on Compare function.
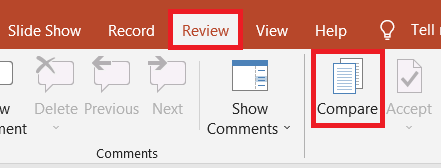
This will open the browse window; find the reviewed version of your presentation and click on Merge.
This action will merge the two versions of the presentation, and PowerPoint will compare & show you the differences.
Step 4: Check Comments and Presentation Changes from the Revisions task pane
After merging the presentations, you are ready to start working on the reviews. For this, PowerPoint has a feature called the Revisions task pane. The purpose of the Revisions task pane is to display all comments and changes made by reviewers.
To start with, head over to the Review tab in the PowerPoint ribbon where you will find the Reviewing Pane next to the Compare function. This opens a list of changes that the reviewer made on the right-hand side. These changes could be comments that can be seen under the name Slide Changes and/or edits within the presentation that can be seen under the name Presentation Changes. Additionally, you can click on each list item to see the details about a change in the body of the slide.
Step 5: Accept or Reject Changes made by others
You have the option to accept or reject the changes proposed by the other team members. Here’s how to do it.
You can straightaway accept all the changes by clicking on the Accept button placed next to the Compare button.
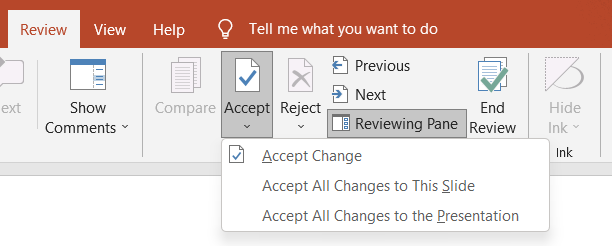
The button has a dropdown menu giving two options – Accept All Changes to This Slide and Accept All Changes to the Presentation. You can choose the former to apply the changes just to a single slide and the latter to apply all the changes across the presentation. Just like the accept button, you can use the Reject button to reject all the changes on an individual slide or all across the presentation.
Similarly, you can straightaway delete the comments by clicking on the Delete button from the Comments group. The button has a dropdown menu giving two options – one for deleting the comments from that particular slide and the other for deleting the comments all across the presentation.
But, you may not be always interested in bulk applying the changes and would prefer going by each feedback at a time, slide by slide. You can use the following steps to do so.
As you do the revisions, you will find yellow checkboxes against each change next to the Other authors, where you can mark to accept a change or see what it consists of. You can easily untick the checkbox to reject the change and leave the checkbox untouched to accept the change. Finally, click on End Review on PowerPoint’s ribbon when you are done.
That was it! Tracking changes, collaborating with a team, accommodating their comments, and edits were as simple as that on Microsoft PowerPoint.
How Should You Use Comments in PowerPoint Review Mode?
When you compare comments and track changes, the most powerful way to absorb feedback is through comments. The track changes feature would just let you see a technical record of what changed from the original version, but the comments can be used to explain the reason for the change.
You can give descriptive feedback on PowerPoint using its comet feature – be it the reviewer’s suggestions or preferences. A smart way of using these features is to use revisions for correcting typos and errors directly and the comment section for stylistic suggestions or coaching the presenter.
Tips for working in the Comments task pane
You can access the comments on a slide by clicking on the chat box icon.
You can right-click on it to read the comment.
Further, you will see the Next and Previous buttons to move to the next comment and to the previous comment respectively.
Finally, you can delete the comment right away by clicking on the cross button on top of the comment.
Get better at Reviewing – Tip for the Reviewers
As you go through the comments of a reviewer, their name or initials can be seen. In most cases, this is set up by PowerPoint automatically using the reviewer’s system settings, if no one configures it manually.
So, how to configure it by yourself?
It’s quite easy. Simply head on to Files, go to Options and click on the General tab. Fill in the User name and Initials fields to set your personalized signature.
This completes the configuration process. Now, all the comments and changes will look more personalized after this step.
Conclusion
So, what are you waiting for? Get all your team members to give feedback and review your presentation. Start using these features to track changes in PowerPoint today.
Related Articles
-
 April 16th, 2024
How to Convert PDF into Usable PPT slides
Blog Post -
 June 18th, 2024
How To Create a Roadmap in PowerPoint?
Blog Post -
 September 1st, 2024
How to Create Interactive Polls and Surveys in PowerPoint Using Microsoft Forms
Blog Post