
How to Protect Content on Your PowerPoint Presentations

Have you ever shared a PowerPoint file with someone and worried about them editing the content in it? In this article, we’re going to take a look at how you can protect content on PowerPoint and how you can prevent edits in PowerPoint.
Mark as Final in PowerPoint
This is a very quick and easy way to prevent others from editing your PPT file. Go to File, and select Info. Click on Protect Presentation, and select Mark as Final.
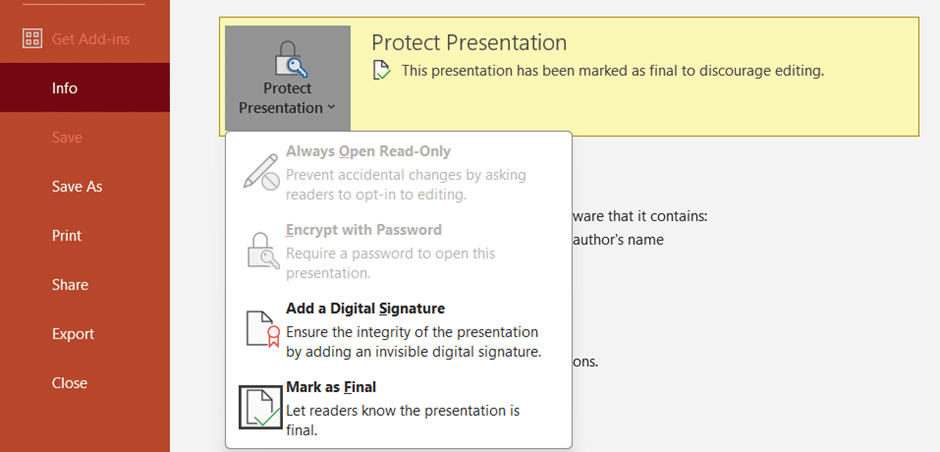
A pop up box will appear that looks like this, select OK.
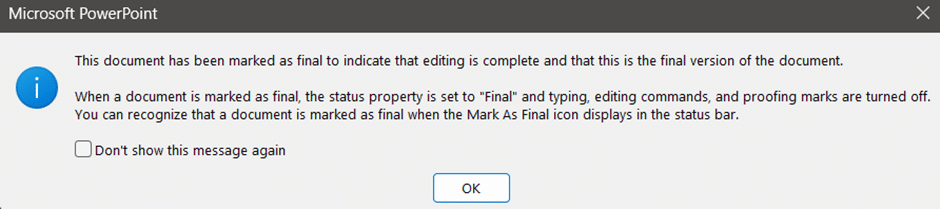
Marking as Final in PowerPoint saves the file, and opens it in a read-only mode, which allows viewers to see your slides.

But this isn’t the best way of protecting your PowerPoint file from edits, since anyone can press on Edit Anyway, and make changes. It would have been better if PowerPoint had a feature where people can make changes, and it gets saved as a different file, and the final one remains unchanged. Microsoft, are ya’ll listening?
Password Protection in PowerPoint
PowerPoint has a password protection feature that you can use to restrict opening the presentation. This is secure, but make sure you do not share the password. Anyone with the password has full access, including editing capabilities.
Here’s how you can use the password protection feature on PowerPoint:
Go to File and click on Info.
Choose Protect Presentation and then click on Encrypt with Password.
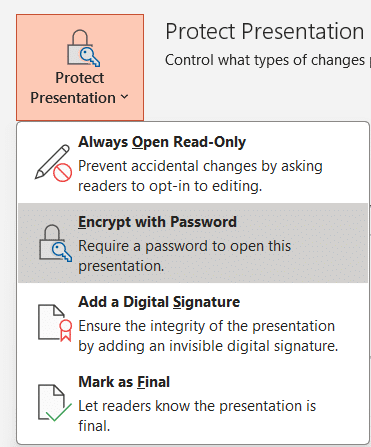
Enter a strong password and press OK.
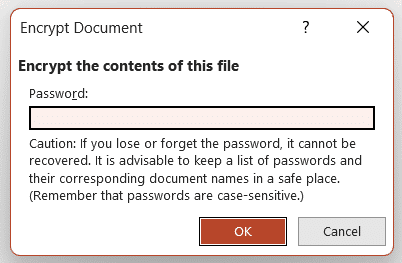
Remember that the password is case sensitive, and if you lose it, you will not be able to open the file. So keep the password safe.
Permission Controls in PowerPoint
You can also change the permission controls in PowerPoint when you share your presentation. This feature gives you the ability to specify who can view or edit your slides. Here’s how you can set it up:
In the top right corner of PowerPoint, you’ll be able to see the Share button. Click on it, and select Manage Access.
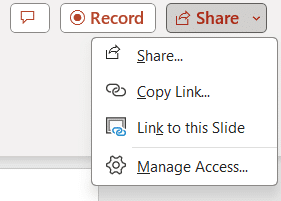
A dialog box will appear, where you can change the permission controls on PowerPoint.
Restrict Editing Options
PowerPoint also allows restricting editing on some specific elements inside a slide. This is great for protecting text boxes or charts while allowing others to edit other areas.
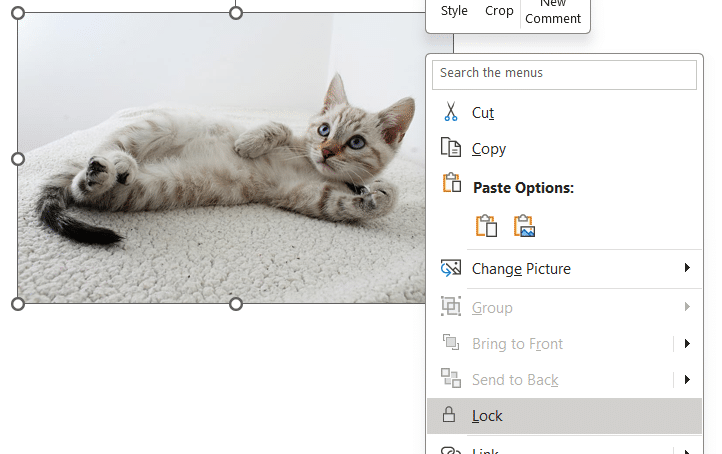
Select the element you want to protect (text box, image etc.).
Right-click and click on Lock.
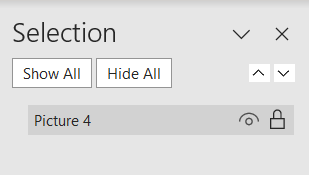
You can also go to Picture Format, select Selection Pane, and press the lock icon next to the object you want to protect.
I hope these steps are simple enough for you to follow and that you’re able to protect the content on your presentations. It is always better to have a copy of your final presentation, in case something goes wrong. To do this, go to File > Save a Copy and save the file with a different file name. Alright, that’s it for now. Do check out the rest of slidebazaar.com for PowerPoint themes and templates, and check us out on our social media channels for more informative content.
Check out our YouTube channel here.
Related Articles
-
 May 15th, 2024
How to Use Cameo in PowerPoint: Guide + Tips
Blog Post -
 October 23rd, 2020
How does the law of supply and demand affect your product marketing?
Blog Post -
 June 25th, 2024
Getting started with Flowcharts in PowerPoint
Blog Post